Contact Profile & History
4 minute read
Beginner
NGO users can see the contact profile and access history from the Glific interface, when there is a requirement to check the same. It could be used for personalized interactions, data-driven decision making, improving support etc.
View Contact profile
1 . Login to the Glific and click on the chats tab from the left panel.
2 . Search the contact from the name of the contact or phone number from the right panel.
3 . From the contact's top bar click on the down arrow (next to the contact name) and click on View contact profile link
4 . Contact profile page will open up. You can check the below details of contact.
i) Name - Contact Name that is shown in chat screen and "View profile-->Details screen" is the one which is set in the flow with @contact.fields.name variable, by the contact.
If the name is not updated with the @contact.fiels.name variable, the name will be picked from @contact.name variable (i.e WhatsApp name set by the contact).
ii) Phone number
iii) Provider status / Optin Staus -If contact is optin and can receive HSM templates
iv) Language - Contact&'s preferred language. NGO users also can change the language and save it to update the language preference of contact.
Create New Profile
1 . Create a new flow and ask a question, the contact if he/she wants to create a new profile.
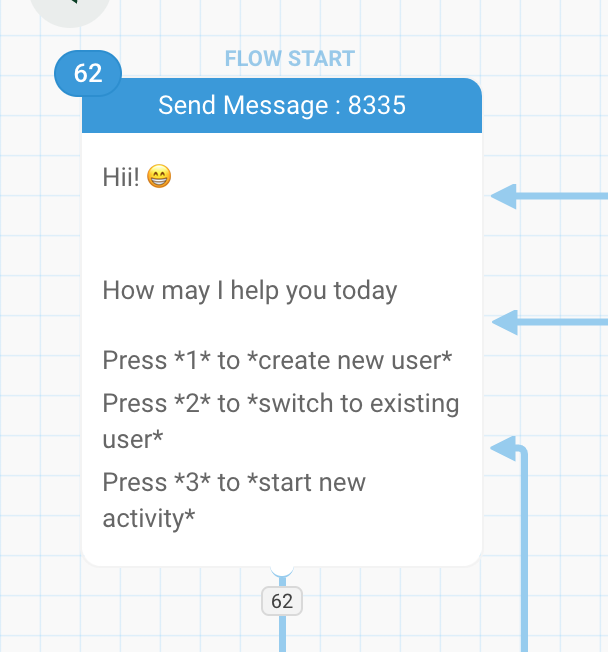
2 . If contact press 1. As contact to provide their profile attributes like name and role

3 . Once the contact share the details use the node with the name manage profile and add the details to the profile.

4 . It will return success or failure. If it returns success add the values. in the contact variables.

Output after executing the flow (Create User)

Access Old Profile
To access the old profile or the profile just create.
1 . Enter option 2 (Switch to the existing user) in the first node created

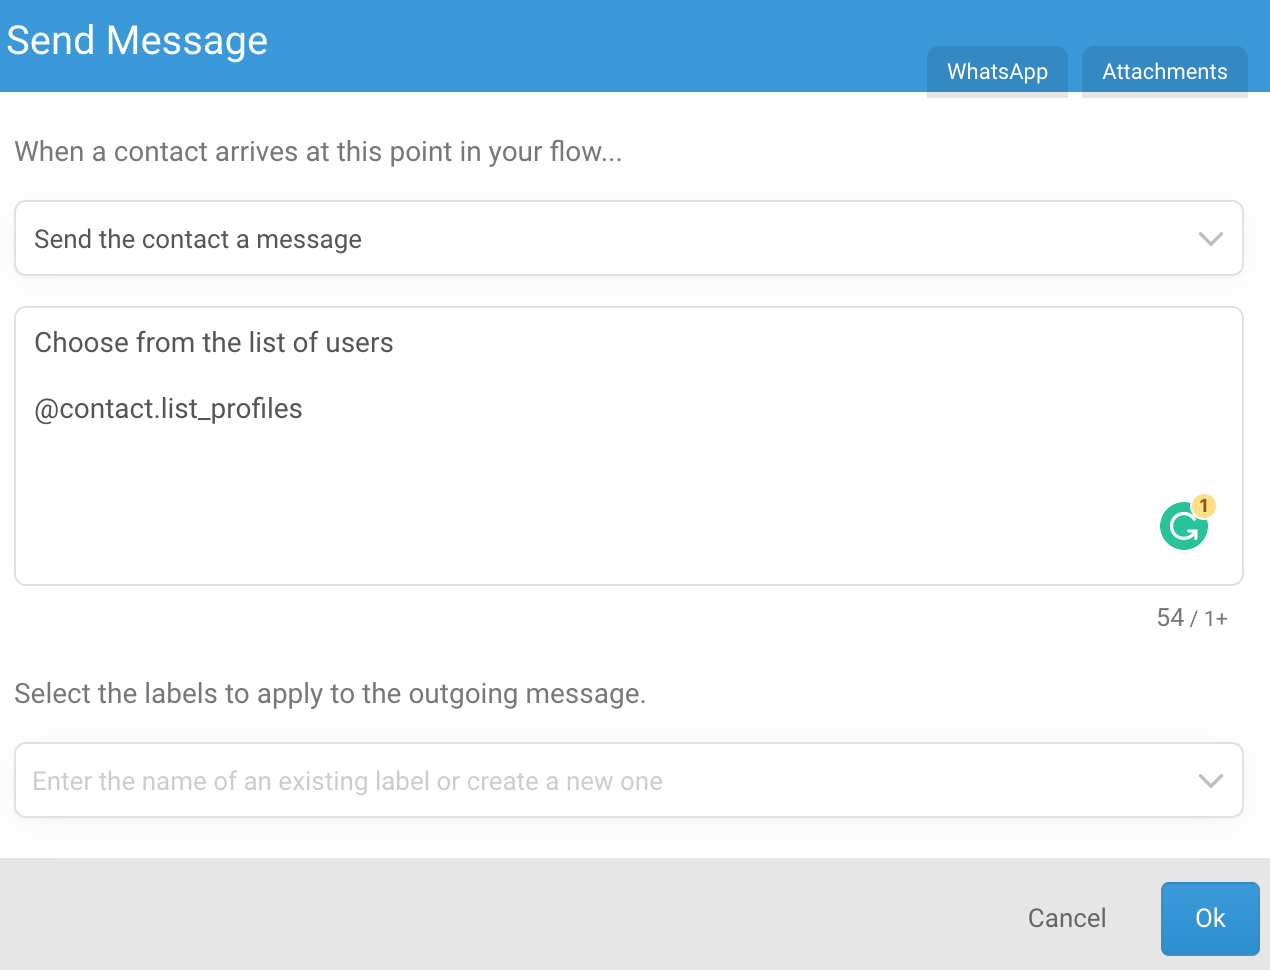
2 . Use @contact.list_profiles to show all profiles that exist for this phone number.
3 . Use the manage profile node to switch the user profile
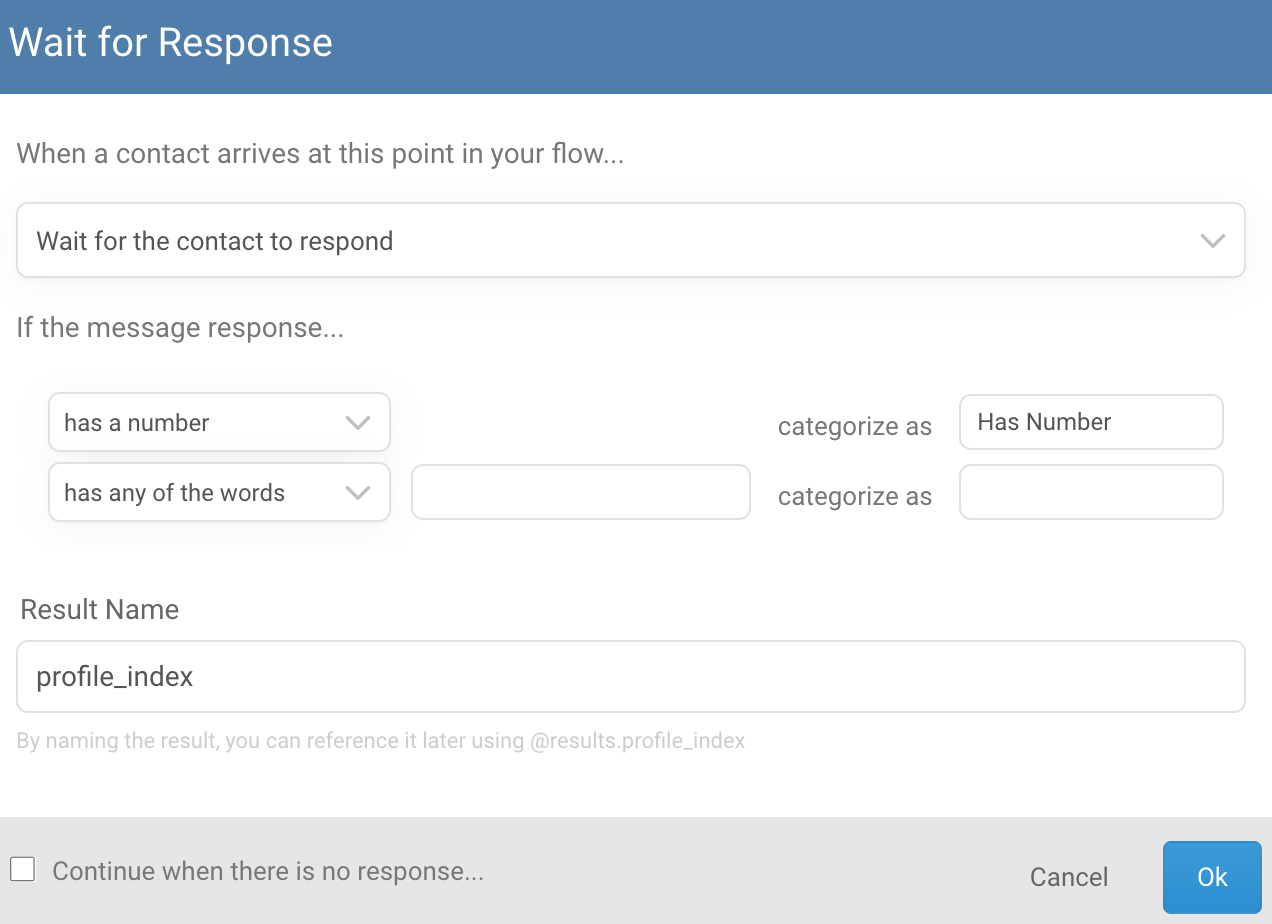

4 . On success, access the profile contact variables with @contact.fields.name
On Failure ask the contact to choose the option again.

Output after executing the flow (Switch User)
User profile 1.

User profile 2

Multiple Contact Profiles with same phone number
Video Tutorial
Please note- This is a video recorded on old UI
It has been observed in some cases, beneficiaries have one phone number and there is more than one person who needs to have their profile created to access the Chat.
In Glific we have introduced a multiple profile feature, which will help more than one person to create their profiles and use the chatbot to access the information with one phone number.
Profiles are like contacts, where contact fields are saved as key-value pairs in JSON format.
A contact can have multiple profiles, but only one profile can be active at a time.
When the active profile for a contact changes, the fields in the profile are swapped with the contact fields.
At the flow level, the contact fields will be replaced with the values from the active profile's fields.
Profiles are synced to BigQuery in a separate table called "profiles."
Below are the steps on how to implement multiple profile features in your flow.
Advanced Feature Webinar
Please note- This is a video recorded on old UI
View Contact History
1 . Click on the History button to see the chat/flow history of the contact.
Flow waked up, marking all other flows as completed
- This appears in the contact history when the flow starts again after the
wait-for-timenode.
-
If the first message goes out,there is a 1-minute waiting time between the first message node and the second node.
-
After the 1-minute wait, the flow will start again and will execute the node that comes after the wait-for-time.
-
At that time, in the contact history it appears
Flow waked up, marking all other flows as completed